Accompanying

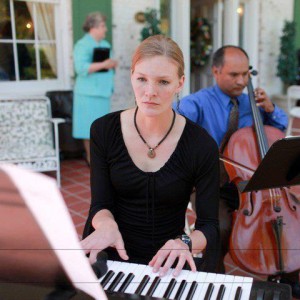
A few years ago, I took a little job accompanying for a Suzuki strings studio. It’s challenging, but learning so many new pieces, and polishing my accompanying skills is so much fun. So this week, as I’ve been practicing for hours each day in preparation for the big recital, I remembered my own accompanists from years ago.

In college, I never truly appreciated how much an accompanist does. Being a typical singer, I would forget to count half way through the long notes, and fudge a bit (for breath-sake) on the odd rhythms. Tricky entrances were my worst fear. I also chose the songs with the most difficult accompaniment because they were the most beautiful. And somehow, they kept up with me and never complained.

Little did I realize the possible headaches and eye rolls that my poor accompanists held back for my sake. And now that I am the one sitting at the piano most of the time, I have learned a few things.

1) Turning pages is hard and sometimes impossible if you don’t have a nifty assistant beside you. Although frowned upon, I use the spread out copies method for the most difficult, long pieces. I’ve also learned the folded corners trick and the memorize-the-first-measure-of-the-next-page trick. Who would’ve imagined that practicing flawless page turns sometimes takes more practice than the actual song?

2) A good accompanist must be all-knowing. My part, your part, everybody’s part and be prepared for them to mess up.

3) When they do mess up (not if), you must use mind-reading techniques to decide how they’re going to react before they do it.

4) You must learn the piece at every speed imaginable. Child A studied diligently and learned the piece at the perfect speed, Child B takes it a bit too slow because the fingerings are tricky, and Child C thinks that this is a roller derby (fast, lightening speed, and haltingly slow).

5) You Tube can be your best friend. Are you bad at multi-tasking on those more tricky pieces and humming over your piano part doesn’t work? I am. That’s why I type it into You Tube and listen to 3 people butcher it before I find a decent recording.

6) Trying to convince a parent that his/her child is not perfect is not a good idea. I have one parent in particular, that each year, while I’m accompanying for her child, thinks that every mistake is mine. Not a big deal until she refuses to pay me because there is no way it’s because her daughter hasn’t learned her piece well enough. Again, if I could mind-read her child, this would be no problem, but alas, it is not.

7) If you do make a mistake, everyone will notice and likely remember. If you don’t mess up, few will notice that you played at all. It makes me laugh, but it’s completely true.

This is my heartfelt thank you to my accompanists (Tim, Tim, and Roy) for not killing me during college. You really showed me the grace of God.
This year, as I was going through some health problems, I had little extra energy for my normal level of creativity with my students, so I looked to use other people’s creative ideas. Here are my favorites that I used frequently this year.

1. First is a site called colorinmypiano.com Joy has some wonderful ideas and helpful resources for studio teachers. From practical evaluation forms to games and lesson planning, this is a wonderful resource and all of them are free!

2.From teacherspayteachers.com, I’ve found a kindred spirit. Her teacher label is “Aussie Music Teacher.” She is constantly adding theory games, great music ideas, and other great music-teaching resources to her catalog—many of which are free!!

3. And last but in no way least, susanparadis.com is another wonderfully creative and free site filled with more great resources and games for more student and parent engaged learning.

If you’re serious about wanting to sing but have little money, this is for you.

Recently, I’ve had several people get in touch with me, desperately wanting to gain singing skills but having little to no money.  Here are my recommendations for the impecunious wanna-be singer.

  1. Find and join a church choir or two.  Most churches have a choir and they are absolutely free.  This is a good way to begin learning to sing with others, following direction, and learning some musical basics.  Sometimes, you can find a church choir with excellent instruction that can help you on your way to meeting your musical goals. The best thing that you can do is sing, sing, sing.
  2. If you’re not religious, there are community choirs.  Some are free and some require a small fee to join and others only accept auditioned singers. Many of these choirs are good to get you started on the basics.  Again, the best thing that you can do is sing a lot.
  3. If you’re needing to learn about of music theory, there are many online games and tools to learn.
  4. If you are in school or college, join the choir, chorus, or lessons.  Most schools offer them as an elective (thus free, or small fee).
  5. Once you’ve got a little confidence built up, find a few friends and sing at a nursing home.  This is a great way to get experience singing for a more generous crowd and many times, singing through interruptions.
  6. Once you’ve got your musical feet under you, try a tougher crowd: family or friends.  They will most likely give you an honest opinion about your sound: whether good or bad.
  7. If you’re feeling confident, try karaoke with friends.  This too is a great place to build some confidence in performing with little judgment.

There are many more options, but these are the ones that first jump to mind.  Best of luck in your singing adventures!!

I have a few students now that require much more daily lesson planning than most other students. They have various disabilities ranging from mild learning disabilities to more severe mental, physical, or visual disabilities. These are in some ways, my favorite piano/voice lessons to teach because these students work hard and really want to be here. The following is a helpful page that I came across while searching for ideas in working with the visually impaired. It is written by a professor of Music in South Carolina that has some very good thoughts on ways to teach most efficiently for students with special needs. Most of these I have intuitively tried to implement, but some I have not thought of on my own. If you are a teacher, I hope that you can find these ideas helpful and if you are a parent looking for a teacher, I hope that you can use some of these thoughts as guidelines in what to look for in a piano teacher. Enjoy!

http://www.music.sc.edu/ea/keyboard/PPF/5.1/5.1.PPFke.html

Are you trying to find a piano teacher for your child but know nothing about piano? Here are a few questions that you might want to know and a few possible answers that you might hear.

1. What methods does the teacher use when he or she teaches? The teacher might mention some of the following.

Classical method:
This is the most common method for piano teachers. This involves teaching sight reading, rhythms, finger/hand technique and theory.
Pros: A student of the classical method has a very well-rounded understanding of music.
Cons: Students don’t learn how to play lead sheets (or real-life music) or improvise.

Suzuki method: this method is mainly training the child by ear and having much parental involvement.
Pros: The parent is highly involved in the child’s music training. The child focuses more on good technique and learns things by ear.
Cons: The child does not usually learn to sight-read notes. This is a major hindrance to children using this method unless it is combined with note reading exercises.

Simply Music (or the Australian method)
This method teaches how to read lead sheet and improvisational playing through chordal understanding.
Pros: the student can play many well-known songs quickly. The student learns chord use and lead sheet reading early, and eventually learn to transpose. Much is learned by ear. The student learns improvisation early on, jazz techniques and accompaniment techniques. It is recommended for children that struggle with normal piano techniques.
Cons: Although this method is strong on teaching in lead sheet format, students do not learn how to read traditional two-handed music. The area of classical techniques and sight-reading is very minimal.

Kodaly method: A method designed more for singing. Most know it as the Do-Re-Mi method. It uses speech patterns to help children connect with rhythm and notes. It’s unlikely that a piano teacher will mention this one, but there it is just in case.
Pros: It’s highly effective to help children feel and understand beat.
Cons: The names used for rhythms (like ti-ti to signify 1 and for eighth notes) and note names (do for c, etc…) is somewhat confusing for children if they are going to switch over to classical method at any point.

The next two methods are mainly used in the classroom, but I have heard teachers mention these methods when talking to parents interested in lessons. These teachers are taking advantage of the parents ignorance because the parents don’t know that these are not regularly used in piano lessons.

Dalcrow method: this method combines movement with music (used mostly in classrooms)
Pros: helps children to feel a steady beat.
Cons: You probably won’t do much dancing for piano lessons

Orff: Using musical instruments to play patterns of music.
Pros: It goes well with Dalcrow and Kodaly.
Cons: Again, not used in piano lessons.

I use a combination method of the kodaly method for beginners (to establish feel of beat), classical method for all, and Australian method for older students (after they are proficient with in their theory, rhythms and sight reading).

Many teachers say that they use a combination method. Don’t let them stop there. Ask them about specifics like those question 2.

2. Does the teacher focus on ear training, sight-reading, hand/finger/playing technique, rhythms and theory?
Each one of these is very important.

3. What books does the teacher use?
Although the books that they use do not matter so much, sometimes teachers use the books to describe their methods. For example, the teacher might say, I use Alfred’s basic piano library, Bastien series or the Piano Adventures series. There are plenty of other good ones out there, but keep in mind that you want to know what they teach.

4. How much do the lessons cost and how long is the lesson? Depending on the teacher’s degree, location, and demand, lessons can range anywhere from $15-65 per half hour or hour lesson. The current average for Lancaster, PA is between $20-35 per half hour.

5. At what age, does the teacher recommend giving lessons?
My personal preference is begin when the child can read or the age 6. Generally, they are much better equipped to start at 6 then at 5.

6. How much should you as the parent be involved?
Depending on the teacher, you might be highly involved or not. It depends on what you want and what the teacher allows.

7. What are the suggested requirements for the student’s practice?
For young students (6-7) that are just beginning, I usually recommend 10-15 minutes of practice a day. For most other students, 30-45 minutes, and those that are serious and able, 1 hour.

Have you ever thought of becoming a professional whistler?

Or how about a throat singer?

Just recently I had a student tell me,  “I don’t like my voice. I’m hoping that it will start to sound different after taking lessons for awhile.”  Unfortunately, this is how many, many people feel about their own singing voice.  Thus, much of my job as a teacher is to help my students appreciate their own voice and gain confidence in using it.  One of the first things I tell students is that “if you think that you are here to learn to sound like _(insert favorite singer’s name here)__, you’re going to be disappointed.  I’m here to help you find YOUR voice and to learn how to use it’s full potential. Who knows?  You may end up loving your voice more than so-and-so’s *wink*.”

Here is what one very wise teacher (Catherine McNeela) has to say.

This comes from a helpful music teacher’s blog

This past summer, I had the opportunity to teach far outside of the box.  There were several students that expressed a desire to learn to play the piano and were all very eager to do so, the only  difficulty was, most of them did not have hands or had only partial hands.  This was a new challenge that I had not previously faced, but was excited about this opportunity nonetheless.  Thus, with insight from their mom (who said that her children were inspired by this man), we found an adjustable stool, I rearranged and wrote new music to make it physically possible to play, and they learned to play with their toes. It was wonderful to see how much progress they were able to make over just one summer!

So what is the point?  It took extra time, me getting over my dislike of feet, and learning to understand how much each student could be pushed and what was actually possible.  I had to be flexible and willing to delve into the territory of the unknown (creativity).  This is not to toot my own horn, but simply to say, if you are willing to try something new, wonderful things can happen.

Many times, I come across students that have no “disabilities,” but are just as handicapped by their lack of self-confidence.  This is one of the most common things that I see as a vocal teacher.  How you think, affects how you sing.  If you think you can conquer a high note (that is of course, within your range), than it’s much more possible to do that.  Many times, students look at a note and because it looks high on the staff, they can’t seem to reach it because they don’t think they can (even though they warmed up much higher than that minutes before).  Thus, part of my job as a teacher is to be the cheerleader, the counselor, the coach.  Sometimes, lessons end up being more of a pep talk than anything else.  And if I’m willing to be flexible with the time, and am willing to set aside goals for the lesson, sometimes those pep talks are the turning points for students.  With those students that tend to be high stress, it helps to be silly, joke, and do lots of breathing, stretching, and relaxation exercises for they even play or sing one note.  It takes time from the lesson, but it’s very important.

A good example of this is an adult student that I taught.  When she first began taking voice lessons, she was not able to sing above an F4. She had a big personality, and a big speaking voice, but her range was very, very small (less than one octave) and singing anywhere above F4 was very quite and barely audible.  After a few weeks of trying out that new higher part of her voice, and after much encouragement, she was able to use it.  It took many times of my saying, “You may not like the sound at first, but keep using it and it will get stronger and stronger.”

To conclude, if you have the opportunity to work with someone that has a physical or mental disability, or if they are just “stuck,” don’t be afraid to try new things.  Good luck!


Next Page »